This article embarks on a quest to master the craft of weed control in vegetable gardens, delving into a wide array of strategies and techniques.
Whether you’re a seasoned horticulturist or a gardening novice, our all-encompassing guide arms you with the insight and tools needed to reclaim your verdant sanctuary.
Walk with us as we unearth effective methods to help your garden flourish, free from the tyranny of weeds, and yield the plentiful harvest you envision.
Let’s get started.
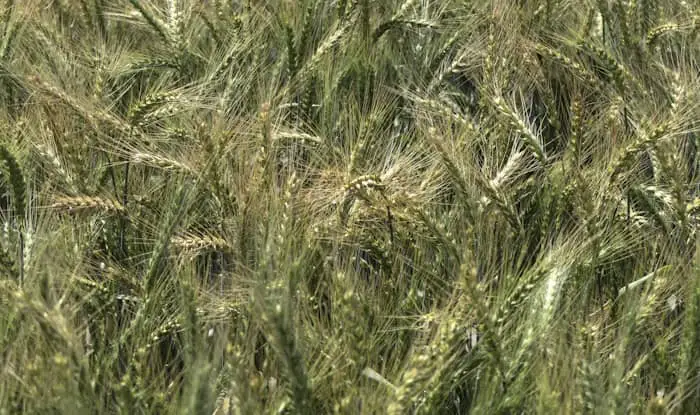
Weed Eradication
Alright, my fellow gardening aficionados, let’s delve into the thick of weed warfare. If you’ve ever devoted an entire weekend to wresting weeds from your vegetable garden only to discover fresh ones sprouting by Monday, this piece is for you.
The Tried-and-True Method: Hand Pulling
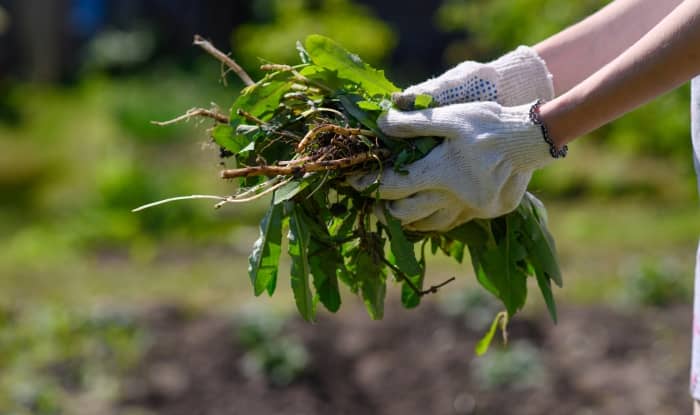
Hand pulling is the genesis of weed control, and its effectiveness remains undiminished. This no-nonsense technique requires neither fancy equipment nor chemicals, making it an ideal choice for those who prefer to keep gardens organic.
The secret to successful hand-pulling lies in timing. It’s crucial to tackle those unwelcome weeds while they’re still in their infancy before they’ve had the chance to develop deep root systems or start dispersing seeds. This is a lesson I learned the hard way, after allowing a handful of modest-looking dandelions to evolve into a full-scale invasion.
Another key consideration is the soil’s moisture level. Pulling weeds becomes easier when the soil is slightly damp. The roots will slide out more effortlessly, minimizing the chances of leaving any fragments behind. However, remember that damp doesn’t mean drenched; you don’t want to end up with a muddy quagmire and potentially waterlogged veggies.
When it comes to pulling, aim to grip the weeds close to their base and exert a gentle pull to extract the entire root system. If the root snaps, use a hand trowel or fork to dig out the remaining portion. This might seem like an extra hassle, but it’s a small price to pay compared to having the same weed reappear a few days later.
Don’t overlook the importance of wearing gloves while pulling weeds. This isn’t merely about maintaining clean hands – some weed species sport thorns, prickles, or skin irritants. I still bear a scar from a particularly vicious thistle encounter last summer!
Lastly, always be mindful of your vegetable plants. The last thing you want is to distress your tomatoes or inadvertently scatter weed seeds while trying to eradicate them.
Consistency is Key
Weeding, albeit laborious, is a crucial part of maintaining your garden. Regular upkeep is the secret to keeping your vegetable patch free of these nutrient thieves.
Establish a routine to pull weeds as often as possible throughout the growing season (1). This proactive approach will prevent weed infestations and ensure your vegetables have exclusive access to the nutrients they need to thrive.
After weeding, don’t discard these intruders haphazardly. If they have seed heads, dispose of them away from your garden to prevent a resurgence. I typically throw mine into a compost bin if they haven’t set seed yet, but you can also bag them for your local green waste collection.
Remember, every weed you extract is less competition for your vegetables. So, arm yourself with gloves, muster up the determination, and declare war on those weeds! Yes, weed eradication is laborious, but the reward of a bountiful, healthy vegetable garden is worth the effort.
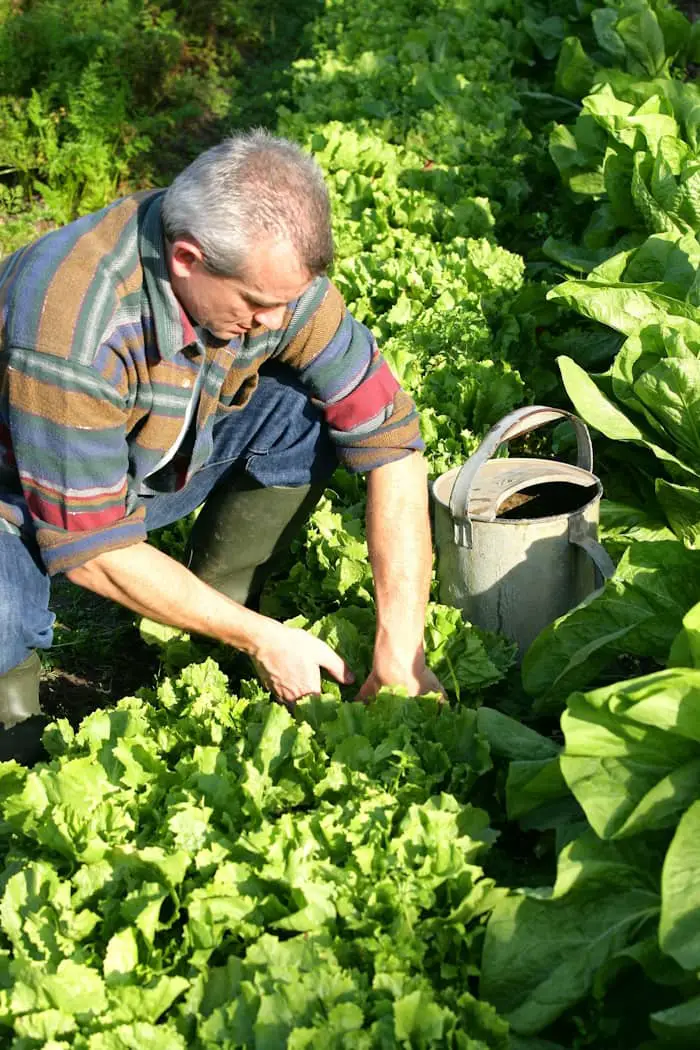
Cutting & Mowing
Cutting and mowing weeds is akin to giving them a disastrous haircut. You’re removing their top growth, disrupting their photosynthesis process, and halting their growth. This method is most effective on younger weeds that haven’t yet developed deep root systems or started producing seeds.
When I started gardening, I underestimated the importance of regular cutting and mowing. It wasn’t until my vegetables were struggling due to weed competition that I understood the value of this routine. So, be vigilant. Keep an eye out for any signs of regrowth because some weeds are audacious enough to bounce back after a trim.
Tools of the Trade
Let’s jump into the heart of the matter – the essential tools you need to kill weeds in your vegetable garden. Picture this as a spa day for your garden, complete with all the necessary equipment for a thorough clean-up. Your arsenal should include garden shears, a trusty lawn mower, a hoe for those stubborn roots, and a weed whacker for precision trimming.
A string trimmer is a useful tool for hard-to-reach areas and weeds growing around rocks and fences. For larger, more open spaces, nothing beats a good old-fashioned mower. Not only does it keep your garden neat, but it also keeps you active. Who knew gardening was a great way to squeeze in some cardio?
Timing
You’re probably asking, “When is the best time to embark on this weed-whacking crusade?” The beauty of cutting and mowing lies in its efficiency. A quick grooming session now and then is usually sufficient to keep those irritating weeds under control.
However, consistency is key. Regular trims throughout the growing season are crucial in preventing weed flowering and seeding.
After each mowing session, make sure to discard or compost the weeds. Leaving them on the soil surface is akin to rolling out the red carpet for them to regrow. That’s a party we certainly don’t want to host!
Boiling Water for Weed Control
You’re probably scratching your head right now. “Boiling water? Really?” I get it. It seems too simplistic to be true. But believe this method can be effective, especially on young weeds without deep root systems.
The scalding hot water burns the weeds, causing them to wilt and eventually perish. However, it’s not a magic trick. You’ll need to repeat the process several times to thoroughly exterminate these garden pests, as many weeds can regenerate from their roots.
All you need to do is boil water in your kettle, carefully carry it to your garden, and pour it directly on the weeds. But remember, accuracy is essential here! You don’t want to douse your beloved vegetable plants or other flowers with boiling water, as it can harm them.
Remember to prioritize safety. As someone who has learned the hard way, I can’t stress enough the importance of wearing protective clothing and shoes while using this method. A splash-back of boiling water on bare skin is an experience you definitely want to avoid.
One of the best aspects of using boiling water for weed control is that it’s economical and eco-friendly. There’s no need for potentially harmful chemicals or pesticides. However, like anything beneficial, moderation is crucial.
Boiling water can temporarily sterilize the soil, so use it sparingly and avoid pouring it in areas you plan to plant soon.
Post-Emergent Herbicides
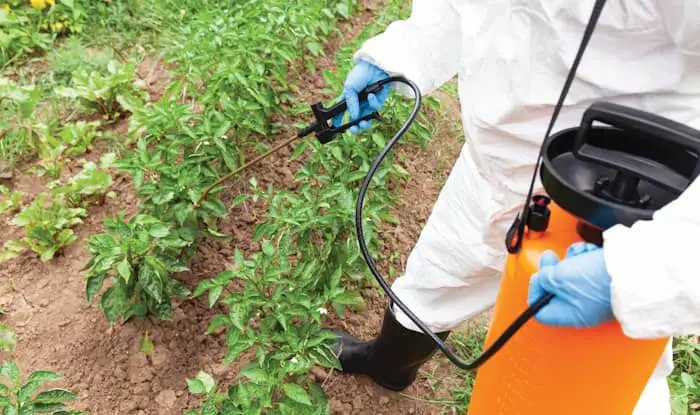
So, what exactly are post-emergent herbicides? Simply put, they’re our tactical strike against weeds that have already sprouted and are wreaking havoc in our gardens. But there’s a strategy for using these plant protectors. They’re not a magic wand you can simply wave around; understanding their properties and correct usage is key.
Before you recoil at the mention of ‘chemical,’ consider this: there’s an eco-friendly path as well. Horticultural vinegar, pelargic acid, citric acid, and d-limonene are organic herbicides that are not only effective against weeds but also safe for the environment (2).
Ask any seasoned gardener, and they’ll tell you that timing is everything, especially when it comes to weed control. Apply your post-emergent weed killer when the weeds are in their growth stage for maximum impact. But there’s another vital player in this game: the weather. Choose a calm, dry day to apply your herbicides to ensure they stay where they’re meant to be and don’t drift away with the wind.
You can also shield your vegetable plants using a piece of cardboard while you spray, as most organic herbicides can harm your vegetables. Using tools such as a sprayer or a wick applicator can help you target the weeds precisely. After all, you wouldn’t want your tomatoes to get a taste of that herbicide, right?
When handling herbicides, wearing protective clothing, gloves, and eye protection is a must. Trust me on this one; I learned the hard way when I got a splash of herbicide in my eye. So, suit up before you start.
The Magic of Flame Weeding
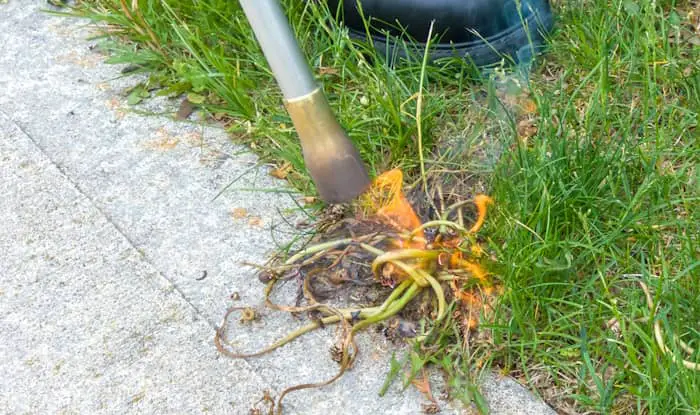
Flame weeding is no flash in the pan; it’s quickly becoming a go-to method among organic gardeners and those wishing to sidestep herbicides. It’s an effective strategy for weed control, particularly useful in open spaces between rows and areas where your precious plants are uncomfortably close to weeds.
But, how does flame weeding work? The process involves briefly passing a flame over weeds for just long enough to burst the plant cells (3). The result is wilted, dying weeds. It’s a poetic twist of fate for the weeds that once choked your cherished plants. This method is most effective on annual weeds and works best when the weeds are still small, about 1-2 inches tall.
To get your flame-weeding journey started, you’ll need a flame weeder. This gadget is essentially a magic wand for gardeners, connected to a propane tank, allowing you to direct the flame right where it’s needed most.
As thrilling as it might be to torch your weed problems, remember that we’re dealing with fire. Always have water or a fire extinguisher on hand, just in case. And if your veggies are close to the weeds, consider shielding them with a piece of metal or plywood to prevent any unintentional grilling.
One major plus of flame weeding is that it doesn’t harm the soil’s structure or its beneficial organisms. It only affects the soil’s surface, making it an optimal choice during dry conditions when plants and soil are less moist, and heat can be more effective.
However, flame weeding does have a weakness. It’s less effective at eliminating perennial weeds with deep root systems, as these tenacious pests may regrow.
Despite this limitation, flame weeding has many redeeming features. It doesn’t leave any chemical residues, making it an environmentally friendly option. Plus, it provides immediate results. You can practically watch the weeds wilt and die shortly after treatment — a satisfying sight for any frustrated gardener.
Plant Spacing as Your Secret Weapon
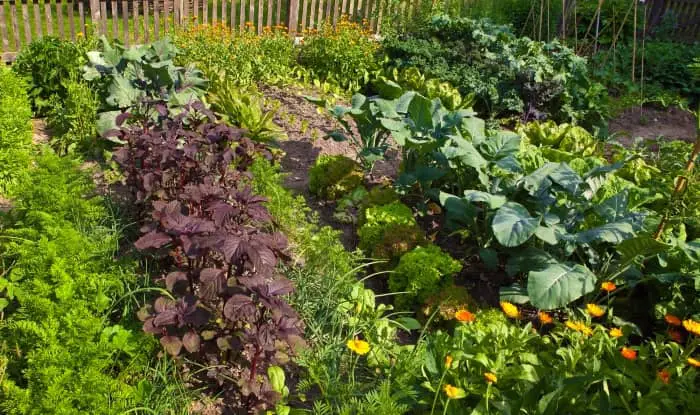
Have you ever found yourself in a jam-packed subway car, struggling for space to breathe? That’s what it feels like for your veggies when crammed too close together. They’re stuck in a game of survival against weeds without the option to disembark at the next stop.
The secret to winning this battle? Proper plant spacing. It’s a simple strategy that gives your vegetables the space they need to thrive and helps keep those pesky weeds at bay.
When your plants have the right amount of space, they create a lush, leafy canopy that provides shade to the soil, preventing weed seeds from sprouting. More space translates into better air circulation, reducing the damp, humid conditions that weeds adore.
Here’s where the magic happens: with adequate spacing, your vegetables aren’t competing with weeds for sunlight, water, and nutrients. They get the limelight and the good stuff without weed gatecrashers trying to steal the show. Plus, wider spacing makes it easier to spot and evict any budding weed intruders early on.
One Size Doesn’t Fit All: Mastering the Art of Plant Spacing
So, how much room do your plants actually need? Well, it’s not as simple as one-size-fits-all. Just like you wouldn’t squeeze into shoes two sizes too small, your plants need a comfortable fit, too.
The surest way to get it right is to follow the instructions on your seed packets or consult a dependable planting guide. Each vegetable variety has its own spacing requirements. By customizing your plant spacing, you’re not just outsmarting weeds, but also fostering healthier soil. Reduced competition for nutrients and easier integration of organic matter sounds like a win-win, doesn’t it?
Direct Watering
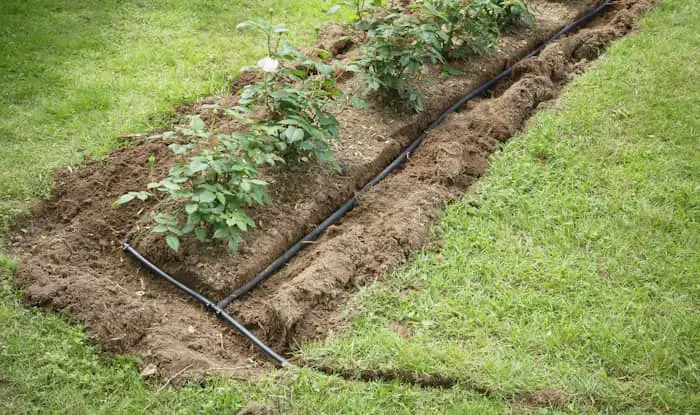
Direct watering can be a game-changer in your fight against weeds.
Picture this: On a hot summer day, you’re out in your garden, quenching your plants’ thirst. You might be tempted to give them a broad overhead soak. But, you’re doing them – and yourself – a disservice.
Direct watering, delivering water straight to the base of your plants, is a more efficient strategy for preventing weed growth. Methods like drip irrigation or soaker hoses are your allies here. They conserve water and avoid wetting areas where weeds are waiting to spring up.
Here’s a captivating fact. When you water your plants directly at their base, the water penetrates to the roots. This encourages the roots to delve deeper into the soil, leading to stronger, more resilient plants. And let’s face it, who doesn’t want that?
That’s not all! Direct watering also ensures your plants receive the precise amount of water at their roots. This encourages healthier growth, leading to a more plentiful harvest. Nothing matches the satisfaction of a bountiful yield after investing your time and efforts.
Minimizing Water Waste and Disease Risk
If you’re a conservationist like me, waste is a big no-no. Overhead watering can be quite wasteful, with water scattering in unnecessary areas. By switching to direct watering, you’re focusing the water on the plants that need it. This not only reduces overall water usage but also minimizes wasteful watering.
Another benefit of direct watering? It diminishes the risk of fungal diseases, which thrive with overhead watering. By avoiding water on plant foliage, you’ll keep your veggies healthier and happier.
As I’ve discovered, altering your watering strategy can be a significant ally in your struggle against weeds. It’s a simple change, but the benefits are immense. So, next time you’re out in the garden, hose in hand, remember: direct watering is the key! Your vegetables will thank you, and the pesky weeds will be left parched and desolate.
Cover Crops
If you’ve ever been entangled in a seemingly endless fight with weeds in your vegetable garden, it’s time to meet your new ally: cover crops, or “green manure,” as it’s affectionately known. While the name might not inspire images of a gardening superhero, these crops can pack a powerful punch in the battle against weeds.
Think of cover crops as the Swiss Army knife of gardening– versatile, useful, and surprisingly enjoyable to use once you understand them. They’re not grown for your dinner plate but planted to protect and enrich the soil.
Why should you surrender a part of your garden to these non-edible crops?
Cover crops are the silent champions of the vegetable garden, taking over during the off-season or the quiet period between planting cycles. Their mission? To outsmart and outgrow those stubborn weeds.
These fast-growing plants spring into action quickly, casting a shadow over the soil, inhibiting weed seed germination, and outcompeting weeds for nutrients and water. Essentially, they’re like a bouncer for your garden, preventing unwanted intruders from causing havoc.
The advantages of cover crops extend beyond weed control. Once these crops have fulfilled their mission and it’s time to step aside, they’re tilled back into the soil before they can set seed.
This is where the “green manure” moniker truly shines. These crops decompose in the soil, infusing it with a generous amount of organic matter that improves soil structure and enhances nutrient availability. This prepares the soil for the next round of vegetable crops.
Selecting the Perfect Cover Crop for Your Garden
There’s a cover crop for every garden, and your choice will depend on your specific needs and conditions. Clover, rye, vetch, and buckwheat are some popular options, each with its unique set of benefits, from nitrogen-fixing capabilities to swift growth rates.
For instance, I’ve seen a remarkable improvement in my vegetable garden with clover. With its nitrogen-fixing superpower, it has rejuvenated my soil, giving my veggies a nutrient boost while keeping those pesky weeds under control.
So, the next time you’re grappling with an onslaught of weeds, why not enlist the help of cover crops? They’ll not only aid you in the war against weeds but also enhance your soil’s health and fertility for future crops. Cover crops: they’re the garden gift that keeps on giving. And, they might just turn out to be your secret weapon in the quest for a thriving, weed-free vegetable garden.
Understanding Pre-emergent Herbicides

In the realm of gardening, prevention is usually more effective than cure. This strategy applies particularly well to weed management in vegetable gardens, where pre-emergent herbicides can play a useful role.
These powerful tools are designed to be spread across your soil early in the season, long before the weeds germinate. Imagine them as a chemical moat, safeguarding your vegetable fortress from an impending weed invasion.
Just like in most gardening tasks, timing plays a pivotal role when using a pre-emergent herbicide. Depending on your local climate and the specific weed species you’re targeting, the ideal application period varies. It’s akin to deciding the perfect moment to serve dinner to your guests – too early, and they’re not ready; too late, and they’re already ordering takeout.
When it comes to selecting your herbicide, it’s crucial to ensure you’re choosing an ally, not an enemy. Aim for one labeled safe for vegetable gardens and compatible with the specific plants you’re cultivating. After all, the last thing you want is to inadvertently harm your beloved tomato plants while attempting to eradicate unwanted weeds.
If you’re committed to organic vegetable gardening, you can use corn gluten meal as a pre-emergent.
Applying Your Herbicide
The application of pre-emergent herbicides requires a bit of finesse. Think of it as painting a canvas – you want to start with a well-prepared, smooth soil surface to ensure even coverage and maximize weed-blocking potential. Always adhere to the manufacturer’s instructions for application, using a spreader or sprayer as recommended.
Here’s a nugget of wisdom: some pre-emergent herbicides require watering after application to activate the chemical barrier. It’s as if they need a hydration boost to kick-start their function, much like how I need my morning cup of joe.
Once you’ve deployed your herbicide, resist the urge to disturb the soil. Doing so can break the chemical barrier, effectively opening the gates for the weeds. Keep in mind, that these herbicides won’t kill existing weeds and may not be effective against all weed species, so vigilance is necessary in assessing the effectiveness of the treatment.
Mulch
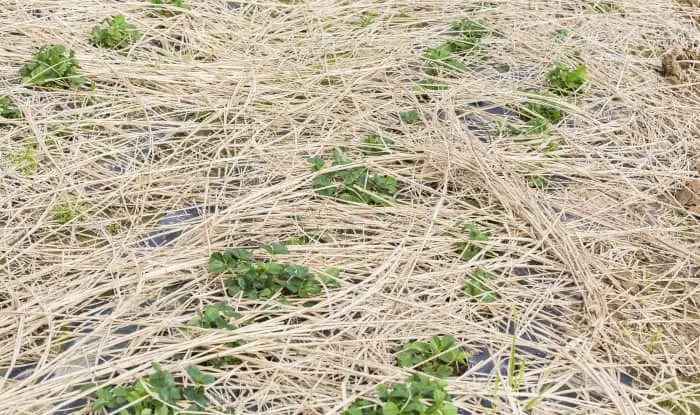
Mulch works by covering soil and blocking sunlight from reaching the weed seeds. Without the vital process of photosynthesis, weed seedlings struggle to grow. In essence, mulch blankets your soil, keeping germinated weed seeds in perpetual darkness.
But the benefits of mulching don’t stop there! In addition to being a weed suppressor, mulch acts as a moisture-retaining champion. It reduces evaporation, ensuring your soil remains moist and your vegetable plants happy. This moisture retention further discourages weed growth – a win-win situation, isn’t it?
When it comes to mulch options, weed-free straw, grass clippings, and shredded leaves are excellent choices. They’re like the VIP guests at the soil party. You may be tempted to use wood chips or shredded bark, but bear in mind, that these materials take considerable time to decompose. This delay could complicate future planting and cultivation, making it as awkward as navigating a crowded dance floor. Hence, they’re best avoided.
The Mulching Process
Before you embark on the mulching journey, it’s vital to clear the battlefield. Ensure you eradicate the established weeds first. Think of it as cleaning up after the party crashers before installing a new security system.
Now, it’s time for action! Start by laying down a layer of newspaper 5-10 layers thick or a layer of cardboard over your garden area. Ensure the edges overlap to create an impenetrable weed barrier. Consider it as the bouncer at the garden party, keeping unwanted weeds at bay. Once your paper or cardboard layer is in place, soak it thoroughly with water.
Next, it’s time for the main event – the mulch. Apply a 2-3 inch layer on top of your soaked newspaper or cardboard. This should effectively suppress weeds and retain the soil benefits your vegetable plants adore.
But keep in mind, even mulch needs its space. Keep it a few inches away from the bases of your plants. This distance prevents potential rot and pest issues, ensuring your plants can thrive without interference from unwanted elements.
And there you have it, folks! A simple, natural, and effective strategy to keep your vegetable garden weed-free. Happy mulching!
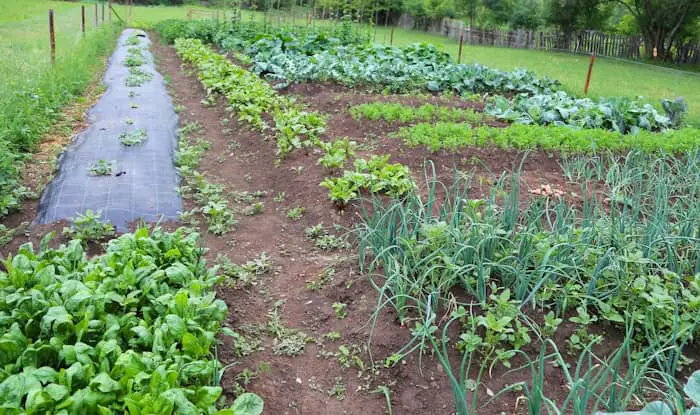
Weed Barrier Fabric
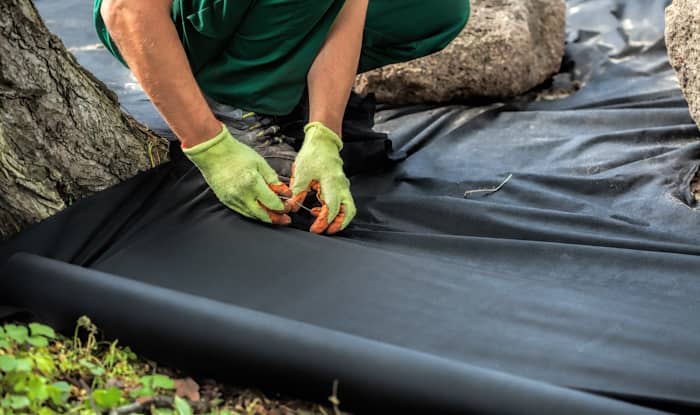
So, what’s the buzz about weed barrier fabric? Also going by names like landscape fabric or garden mat, this tool acts as the gatekeeper for your garden. It allows the good guys – water and air – to pass through while keeping out unwanted invaders – weed seeds itching to sprout.
The charm of weed barrier fabric lies in its ability to block the lifeline of weeds – sunlight. Without sunlight, weed seedlings can’t grow, providing an effective way to maintain a weed-free vegetable garden.
The Where and How of Weed Barrier Fabric
Unsure where to use this fabric in your garden? It’s handy around your plants and walkways within your vegetable garden. Its application is straightforward. Simply roll the fabric over the soil and secure it with garden staples. Make slits or holes where you plan to plant your veggies, and there you have it, a protective shield against weeds.
Mulch: A Dynamic Duo?
You may be wondering, “I already use mulch in my garden, do I need this fabric?” Why not pair them up? Applying mulch over your weed barrier fabric not only amplifies weed control but also adds a touch of aesthetic appeal to your garden. It’s a double-layered defense against weeds.
A Note of Caution
While weed barrier fabric can be a gardener’s boon, remember that every garden has unique needs. Some gardeners express concerns about long-term soil health under fabrics. Assessing your garden environment and using this tool judiciously is crucial.
Also, weed barrier fabric is not foolproof. Occasionally, a stubborn weed might manage to sprout through the fabric and can be harder to remove.
Soil Solarization