Weeds: those uninvited guests in your garden who not only crash the party but also hog the buffet of nutrients, sunlight, and water that your flowers need to thrive.
They’re a nuisance because they engage in a fierce competition with your beloved blossoms. And believe me, if left unattended, weeds are formidable contenders that can easily claim victory.
In this article, let me guide you through the most effective strategies to kill weeds in flower beds and the preventative measures to keep them at bay.
Ready to reclaim your garden from these unwanted invaders? Let’s get started.
How to Tell If It’s a Weed
First things first, any green thumb worth their salt needs to master the art of distinguishing weeds from cherished plants. Here’s how you can become a weed-detecting whizz:
Identifying Common Weeds
Your garden is your haven, but even the most idyllic settings have villains. In the world of gardening, these villains take the form of uninvited guests: weeds. Dandelions may be the bane of one gardener’s existence, while another may wage war on the relentless crabgrass.
Invest some time in getting acquainted with the weeds that frequent your area. This might mean exploring online resources, engaging with a local gardening group, or seeking advice from an extension service. For me, it was my neighbor, Mrs. Thompson, the undisputed weed warrior of our street, who taught me how to identify these green intruders.
Broadleaf vs Grassy Weeds
Weeds are the shape-shifters of the plant world. Some are broadleaf weeds with wide leaves, such as dandelions and clover. Others are grassy weeds, masquerading as innocent grass tufts, making them more elusive and hard to identify (1).
A personal gardening saga I experienced was the invasion of quackgrass in my rose bed. Disguised as a harmless clump of grass, this weed spread its rhizomes throughout the soil before I caught onto its true identity. Lesson learned: never underestimate a weed!
Noticing Their Hideouts
Weeds are opportunistic by nature. They’ll seize any chance to sprout, often in the most unexpected spots. If you spot plants popping up where you haven’t sown any seeds, you’re probably dealing with weeds.
When I moved to my current home, a seemingly lovely plant had taken residence by the driveway. I initially regarded it as a pleasant surprise from Mother Nature. However, I soon realized I had warmly welcomed the notorious bindweed, infamous for its rapid growth and plant-strangling tendencies.
The takeaway? Stay vigilant about where plants are sprouting. Unexpected growth in peculiar places or under harsh conditions is typically a weed’s calling card.
The Final Verdict: Weed or Not?
Weeds can be masters of disguise. They blend seamlessly amongst your flowers, sprout in the most unlikely places, and reproduce at a dizzying speed. But with a keen eye, knowledge about common weeds, understanding their characteristics, and observing their growth patterns, you can outwit these green impostors. Trust me, your flower beds will be eternally grateful!
Unmasking the Hidden Threats Weeds Pose to Your Flower Beds
Unfortunately, weeds are not just an eyesore; they pose real threats to the health and beauty of your garden.
Resource Competition: An Unseen Struggle
Here’s a scenario: You’re at a picnic, happily enjoying your meal, when an uninvited guest swoops in, helping themselves to your sandwiches. Frustrating, isn’t it? This is similar to the scenario that unfolds when weeds make their home in your flower beds.
Weeds are the ultimate freeloaders. They grow faster than your flowers, consuming valuable space and monopolizing sunlight. Their roots penetrate deep, siphoning water and nutrients from the soil. What happens next? Your cherished flowers are left starved, leading to stunted growth and mediocre blooms.
Inviting Pests and Diseases
There’s nothing more heartbreaking than watching your vibrant roses wilt due to disease or pest infestations. And guess what’s often to blame? You got it – weeds.
Consider weeds as the seedy motels of the plant kingdom. They’re notorious for attracting a host of unwelcome pests such as insects, mites, nematodes, and even fungi, bacteria, and viruses. These intruders thrive in the weeds before eventually launching an assault on your flowers (2).
Even craftier are the allelopathic weeds, which release chemicals that stunt other plants’ growth or make them more prone to disease. If weeds were criminals, these would be the masterminds!
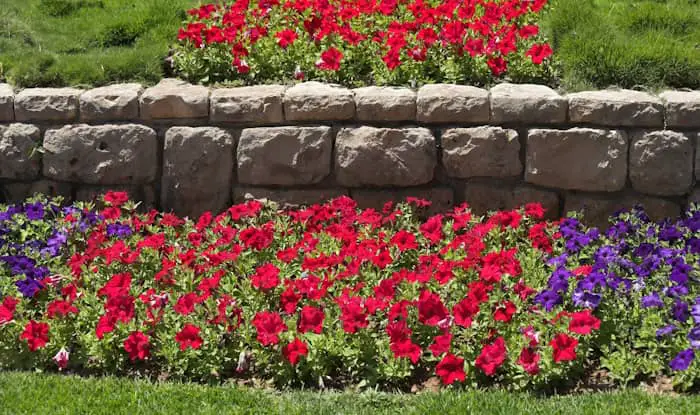
Disrupting Your Flower Beds’ Aesthetics
You’ve spent countless hours planning and planting a visually stunning, color-coordinated garden. But weeds have no respect for your design aspirations.
Weeds introduce unwanted elements, creating an unruly appearance that can detract from your flower beds’ overall aesthetic appeal. They’re like the photo bombers in your meticulously crafted garden panorama.
Weed Removal: Reclaiming Your Flower Bed
Every gardener shares the frustration of seeing weeds invading their carefully manicured flower beds. These pesky green intruders can choke your favorite flowers, transforming your beautiful garden into an unruly wilderness. But fret not, green-thumb comrades! There are strategies to combat these unwelcome visitors. Let’s explore the world of weed removal and how we can reclaim our cherished flower beds.
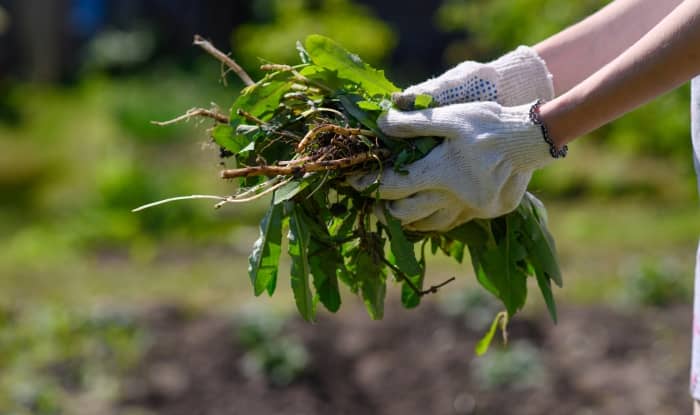
Hand Weeding: A Tried-and-True Tactic
Hand weeding, an age-old practice of manually plucking those pesky invaders from the earth, remains one of the most effective ways to control weeds in your flower beds. With this hands-on method, you can remove the weeds without harming your beloved blooms.
Hand weeding is particularly potent against new or small weeds that have just started to emerge above the soil. I recall my early days of gardening, when I would spend hours stooped over my flower beds, yanking out the tiny invaders one by one. It was labor-intensive but highly satisfying.
The Drawbacks of Hand Weeding
Hand weeding, while effective, comes with its share of cons. Like any manual labor, it can be physically taxing. I’ve had my fair share of aching knees and sore backs after a session. It’s also time-consuming, especially when dealing with a large garden or a dense weed infestation.
And some weeds, such as dandelions, plantains, bindweed, and thistles, have deep roots that require more effort to extract. These weeds scoff at your hand-weeding attempts. To fully eradicate them, you’ll need tools like a spade, a fork, or a specialized weeding tool. The goal is to remove as much of the root system as possible, sifting through the soil to catch lingering root fragments.
Additionally, hand weeding can unintentionally stimulate weed germination. The soil disturbance caused by pulling and digging can bring dormant weed seeds to the surface, priming them to sprout and start the cycle anew. It’s a relentless game of Whack-a-Mole.
Despite these drawbacks, hand weeding could be your method of choice depending on the size of your garden, the type of weeds, and how much time and effort you’re willing to invest. Remember, gardening is a labor of love, not a race. Enjoy the process and relish the satisfaction of a weed-free flower bed earned through your dedicated handiwork.
The Scuffle Hoe: Your Secret Weapon Against Weeds
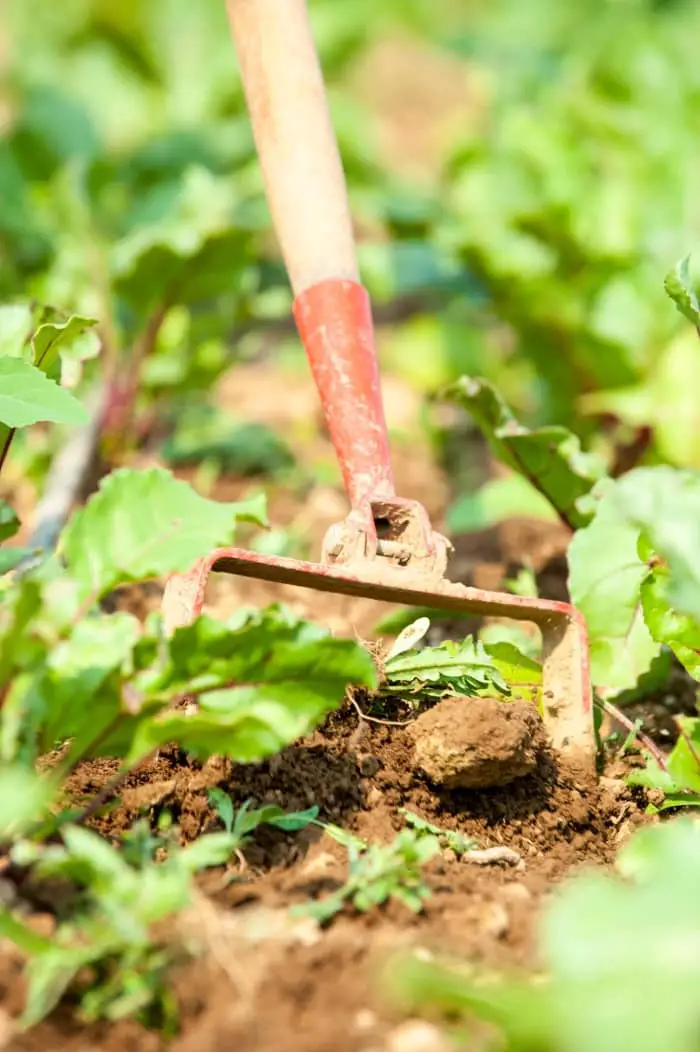
The scuffle hoe, also known as an oscillating or hula hoe, is a godsend in the battle against stubborn weeds. Its dual-sharpened blade can be pushed or pulled along the soil surface, slicing through weeds below ground level.
The beauty of the scuffle hoe lies in its ability to cover a large area with a single sweep, effortlessly cutting down the green invaders. Its precision allows you to target specific weeds without harming your flowers, and its compact size makes it perfect for small spaces and tight corners.
Potential Drawbacks of the Scuffle Hoe
The scuffle hoe also has its shortcomings. Its use can disturb the soil, bringing dormant weed seeds to the surface where they can sprout. It may also leave behind root fragments of perennial weeds, which can regrow under the right conditions.
To eliminate the weeds, you might need to use the scuffle hoe several times. However, this just means more quality time between you and your new garden buddy. Also, like any tool, a scuffle hoe requires care—regular blade sharpening ensures smooth cuts and reduces strain.
Flame Weeding: Turning Up the Heat on Weeds
Let’s explore a somewhat extreme method of weed control—flame weeding!
Flame weeding employs a torch or wand to expose weeds to extreme heat, damaging their plant tissues enough to kill them. This method is efficient, easy, and eco-friendly, as it doesn’t rely on harmful chemicals.
Flame weeding works best on young weeds, no taller than one to two inches with shallow roots. By torching these nuisances, you’re killing the above-ground part, leaving them unable to photosynthesize and grow. However, for deep-rooted perennial weeds, flame weeding might not be the most effective solution.
Flame weeding also destroys the outer coating of weed seeds, preventing germination, as a useful side benefit.
Flame Weeding Considerations
Flame weeding, while effective, is not without risks. Always follow safety instructions, wear appropriate protection, and avoid using it near flammable materials. Also, avoid flame weeding on windy days or when the soil is overly dry to prevent accidental fires.
Flame weeding has costs—equipment, maintenance, and refills. Depending on the product’s size and quality, the cost can vary. But, the sight of a weed-free garden can be worth every penny.
Weed Killers: The Double-Edged Sword
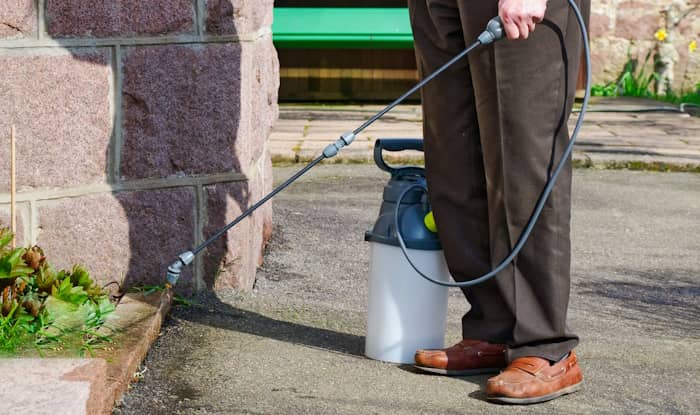
Weed killers, or herbicides, are a two-pronged approach to weed control. These chemicals, when applied to the weeds’ leaves, stems, or roots, can effectively eliminate them from your flower beds and save you time.
However, herbicides can harm your flowers if not applied carefully. Use a spray nozzle for precision and a shield to prevent misdirected spray.
Handling herbicides requires care. Follow the instructions on the label, protect yourself, and keep these products away from water sources, wildlife habitats, edible plants, and areas where children and pets play.
Herbicides require regular application to keep your flower beds weed-free. The frequency depends on various factors, including the type of herbicide, weather conditions, and the speed of weed growth. While prices vary, investing in a quality product will save you time and effort in the long run.
Natural Alternatives To Chemical Herbicides: The Greener Route
Natural weed killers can control weeds without synthetic chemicals. High-strength vinegar is a common natural weed killer, but other alternatives include citrus oil-based products, citric acid, and pelargonic acid.
Natural weed killers are non-selective, meaning they’ll kill any plant they touch, so precision is key. They are most effective on small, annual weeds but struggle to tackle the roots of perennial weeds.
Using natural weed killers is an environmentally friendly way to manage weeds. While not perfect, with careful application and patience, they can be a valuable tool in your gardening arsenal.
A Regular Weeding Schedule: The Key to Success
The key to successful weeding is catching weeds when they’re small and yet to flower or produce seeds. Aim to remove them at least once a month to prevent them from flowering and seeding, which would invite more weeds.
The best time to weed is after a rain shower or watering your flower beds, when the soil is moist and soft, making weed removal easier. Avoid weeding when the soil is dry or hard, as you might damage your flower roots or leave behind weed fragments that could regrow.
Weed Prevention
Maintaining a healthy, beautiful flower bed often boils down to one major task: weed prevention. It’s far easier to prevent weeds from taking root than it is to remove them once they’ve settled in. In this section, we’ll explore some tried and true methods for weed prevention, from the magic of mulching to the power of edging, and even the science behind natural and chemical weed barriers.
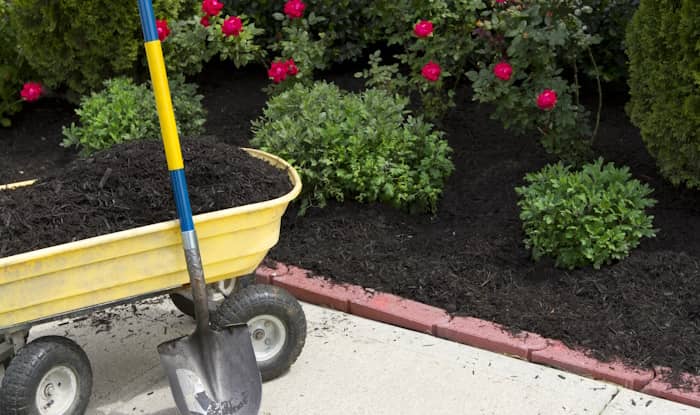
The Magic of Mulching
Mulching is the unsung hero of weed prevention. Think of mulch as a cozy, protective blanket for your flower beds. It covers the soil’s surface, blocking sunlight – a weed’s best friend – and reducing soil temperature. The result? Weed seeds are suppressed, and your flower bed’s soil quality, moisture retention, and overall aesthetic are all improved.
Choosing the right mulch for your garden is crucial. You’ve got many options, from organic mulches like wood chips, bark, straw, and pine needles, to inorganic ones like gravel or recycled rubber (3). The right mulch for you depends on your garden’s specific needs. Acid-loving plants thrive with wood chips, while drought-tolerant plants pair well with gravel.
Applying mulch is a game of precision. Aim for a layer of about three inches covering the entire soil surface. Too little, and you’re rolling out the red carpet for weeds. Too much, and you risk burying your plants or inviting fungal problems.
But before you start mulching, make sure your flower beds are weed-free. Otherwise, existing weeds will simply push through your mulch layer. For an extra layer of defense, consider laying newspaper or landscape fabric under your mulch. However, avoid plastic sheets as they prevent water and air from reaching your soil.
Remember, mulch requires regular maintenance. Like topping up your car’s oil, you’ll need to replenish your mulch layer annually (4). And resist the urge to disturb or move the mulch around – that’s an open invitation for weed seeds to germinate. If you spot any weeds that have managed to sneak through the mulch, remove them straight away.
The Art of Edging
Edging is often overlooked in the gardening world, but it plays a crucial role in maintaining healthy flower beds. Think of edging as your flower bed’s bodyguard. It creates a clear boundary between your lawn and plants, preventing weeds from encroaching on your blooms. Plus, it gives your flower beds a neat, tidy appearance.
There are plenty of edging materials to choose from, including stone, brick, wood, metal, plastic, or even rubber. The best choice depends on your style, budget, and maintenance capabilities.
For example, stone edging offers a natural, durable choice, but it can be pricier. Wood edging is budget-friendly and easy to install, but it may be susceptible to rot and pests. Plastic edging is flexible and affordable, though it may not last as long.
Once you’ve chosen your edging material, it’s time to install it. Make sure to install it deep enough to prevent weeds from sneaking under or over. Ensure it’s level and stable and that it follows the curves and angles of your flower beds. You can use stakes, nails, or even glue to secure the edging in place.
Don’t forget to maintain your edging. Check it annually and make any necessary repairs to keep it in good shape. If you spot any weeds growing through or around the edging, remove them immediately.
Use Compost
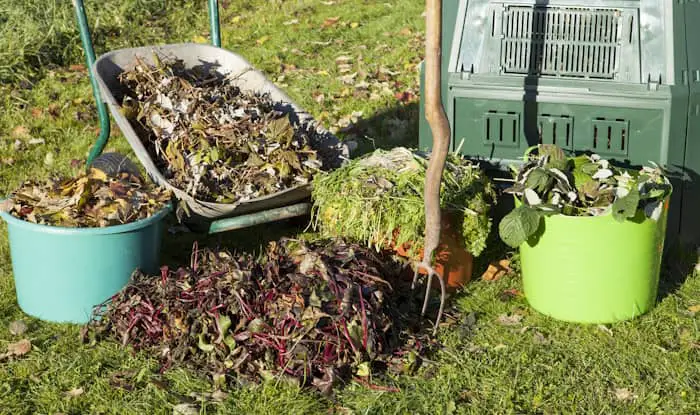
Compost may seem like nothing more than a pile of rotting organic matter, but it’s actually a secret weapon for weed prevention. Compost is packed with decomposed organic matter, nutrients, and beneficial microbes that enrich the soil, improve drainage, and suppress weed seeds.
When choosing compost, it’s important to use a product that has been well-composted and screened to remove any large pieces or weed seeds. This is where homemade compost comes in handy – you know exactly what went into it and, more importantly, what didn’t.
To apply compost, aim for a layer of about 2-3 inches on your flower beds, covering the entire soil surface. Before you apply compost, make sure your flower beds are weed-free. Consider using a layer of newspaper or cardboard under the compost to create a stronger weed barrier.
To maintain the effectiveness of your compost layer, check and replenish it occasionally. And remember – don’t play in the compost! Disturbing or moving the compost around can expose weed seeds to light, causing them to germinate. If any weeds manage to break through the compost, remove them as soon as possible.
The Power of Pre-Emergent Herbicide
Pre-emergent herbicides are a powerful weapon in the war against weeds. They create a barrier in the soil that disrupts the germination process of weed seeds, effectively preventing weeds before they start.
However, not all pre-emergent herbicides are created equal. Several options are available, including prodiamine, dithiopyr, and even corn gluten-based herbicides. The best choice depends on your specific garden’s needs.
Before applying pre-emergent herbicide, remove any existing weeds and prepare the soil by raking or tilling it. It’s also important to time your application correctly in your flower beds.
For summer weeds like crabgrass, apply the herbicide when the soil temperature consistently reaches 55 degrees Fahrenheit for a few days. For winter weeds like bluegrass, apply the herbicide in late summer or early fall when the temperature drops below 70 degrees Fahrenheit.
Post-Application Care
After applying pre-emergent herbicide, water your flower beds with about half an inch of water within 24 hours to activate the product. Avoid disturbing the soil after applying the herbicide, as this can reduce its effectiveness.
A Green Thumb’s Guide to Weed Barriers
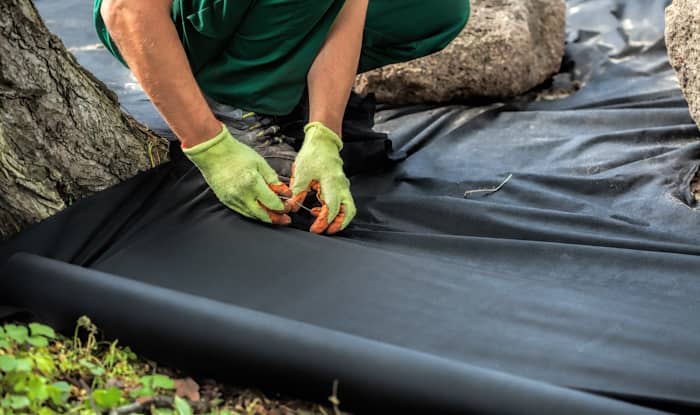
A weed barrier, or landscape fabric, is a simple way to prevent weeds. It blocks sunlight, water, and air, preventing weed seeds from germinating.
There are two types of weed barriers – woven and nonwoven. Woven weed barriers allow water and air to pass through, while nonwoven barriers block these elements. The best choice depends on your specific gardening needs.
Before using a weed barrier, make sure your flower beds are weed-free. Cover your entire soil surface with the weed barrier, leaving some space around your plants.
Secure the weed barrier with stakes, pins, or staples, especially at the edges and corners. Overlap the edges by at least 6 inches to prevent any gaps.
Cover the weed barrier with a layer of mulch to protect it from UV rays and help retain soil moisture and temperature.
Despite your best efforts, some weeds may still break through the fabric. These weeds are often more difficult to remove.
The Salty Truth: Why You Shouldn’t Use Salt to Prevent Weeds
While some gardeners swear by using salt to tackle weeds, this common pantry item can do more harm than good. Salt doesn’t distinguish between weeds and desirable plants, and it can dehydrate and kill both. It can also damage your soil by increasing its pH level, leading to compacted soil that’s less able to retain water, oxygen, and nutrients.
Salt can also harm beneficial microorganisms in the soil, which help to break down organic matter and recycle nutrients. Once your soil becomes saline, it can take years to recover. So, before you reach for that salt shaker, consider the long-term impact on your garden.
References:
- Distinguishing Broadleaves, Grasses, And Sedges – https://ipm.ucanr.edu/TOOLS/TURF/PESTS/brdgrsed.html
- Weeds – https://ag.umass.edu/fruit/ne-small-fruit-management-guide/grapes/weeds
- Mulch – https://hgic.clemson.edu/factsheet/mulch/
- Do I Need to Mulch Every Year and How Much Mulch Should I Put Down? – https://www.landscapemulch.com/blog/do-i-need-to-mulch-every-year/